How To Install A Raised Toilet Seat you ask? Installing a raised toilet seat can be a great way to make your bathroom more accessible for seniors, the disabled, and the elderly. Not only does it make it easier to get up and down from the toilet, but it can also help with balance and stability. In this article, we’ll show you how to install a raised toilet seat in just a few simple steps. So if you or someone you know is looking for some extra assistance in the bathroom, keep reading. So in this post will will walk you though on How To Install A Raised Toilet Seat. Keep reading
what is a raised toilet seat?
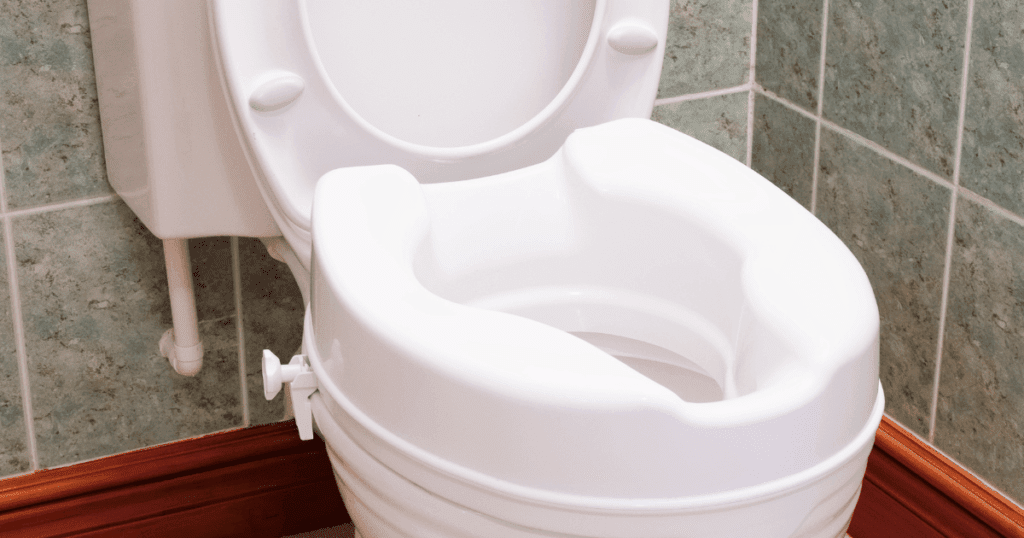
A raised toilet seat is a small platform that can be attached to the top of a toilet bowl. This simple addition can make it much easier for people with mobility issues to use the restroom. Raised toilet seats typically come with instructions on how to install them, but the process is generally fairly straightforward. In most cases, all you need to do is remove the existing seat and lid, and then screw on the new seat using the provided hardware.
Some models also come with an adjustable riser, which can be used to raise or lower the seat as needed. Whether you are installing a raised toilet seat for yourself or for a loved one, it is important to choose a model that is easy to clean and maintain. With a little bit of care, a raised toilet seat can provide many years of comfortable and safe use.

1. purchase a raised toilet seat that fits your existing toilet
If you’re looking for a way to make your toilet more comfortable and accessible, a raised toilet seat might be the perfect solution. Raised toilet seats are relatively inexpensive and easy to install, and they can make a big difference in your daily life. Here’s how to choose and install a raised toilet seat that will fit your existing toilet:
First, measure the width of your toilet bowl. You’ll need to know this measurement in order to purchase a raised seat that will fit properly.
Next, decide how much height you need. Raised seats come in different heights, so it’s important to choose one that will give you the right amount of support. If you’re not sure how much height you need, it’s a good idea to speak with a healthcare professional who can help you make the best decision.
Once you’ve selected a raised seat, the next step is to install it. Most raised seats simply attach to the existing bolts on your toilet. However, if your toilet doesn’t have bolts, you may need to purchase some before proceeding. Once the seat is attached, test it out to make sure it’s stable and comfortable. If everything feels good, you’re all set!

2. Lift your existing seat and lid to make room for your new raised toilet seat
How To Install A Raised Toilet Seat is a relatively easy task that can make a big difference in your comfort and independence. Most raised seats simply attach to the existing seat and lid with a few screws. To install, simply lift your existing seat and lid and position the new seat in place.
Once the new seat is in position, use the screws to secure it to the bowl. Be sure to follow the manufacturer’s instructions for proper assembly. In most cases, you will not need any special tools beyond a screwdriver. With a little effort, you can easily install a raised toilet seat that will make using the bathroom easier and more comfortable.
3. test if the existing toilet seat and lid can stay or needs to removed
If you’re thinking about and looking instruction on How To Install A Raised Toilet Seat? The first thing you need to do is check to see if your existing toilet seat and lid can stay or if they need to be removed. To do this, take a look at how the seat is attached to the bowl. Most seats are attached with two bolts that go through the porcelain and screw into threaded holes in the bowl.
If your seat is attached this way, you should be able to remove it and then reattach it once you’ve installed the raised seat. If, however, your seat is glued or otherwise attached directly to the bowl, you’ll need to remove it completely before proceeding. Once you’ve determined how your seat is attached, follow the instructions below for how to install a raised toilet seat.
4. remove your existing toilet seat if required
If you’re interested on How To Install A Raised Toilet Seat, the first thing you’ll need to do is remove your existing toilet seat. This is usually a fairly simple process that involves loosening a few screws and then lifting the seat off of the bowl. Once the seat is removed, you can then proceed with installing the raised seat. Most raised seats simply require you to attach them to the bowl with a few screws. Then, you can put the seat back on and tighten the screws to secure it in place. With just a few minutes of work, you can easily install a raised toilet seat that will make it much easier to use the restroom.
5. Insert the new raised toilet seat onto the toilet bowl and secure the flanges
Most raised toilet seats are pretty easy to install. You’ll just need to make sure you have all the right tools on hand before you get started. First, take a look at the new seat to see how it attaches to the toilet bowl. Most seats will have two flanges that will fit over the existing bolts on the bowl. If your seat doesn’t have flanges, there will likely be brackets that attach to the bowl in a similar way.
Once you’ve identified how the seat attaches, it’s time to get started. If your seat has flanges, simply place it over the existing bolts and tighten the nuts until the seat is secure. If your seat has brackets, you’ll need to remove the existing bolts and then line up the brackets with the holes on the bowl. Once everything is lined up, just bolt the seat into place and tighten until secure. And that’s it! With just a few simple steps, you can easily install a new raised toilet seat.

6. use the adjustment knob, if required, to secure to raised seat
Most raised toilet seats are easy to install and only require the use of a few simple tools. To start, remove the old seat and lid from the toilet. Next, clean the area around the opening to ensure that there is no dirt or debris that could interfere with the new seat. Once the area is clean, place the new seat over the opening and use the adjustment knob, if required, to secure it in place. For added stability, you may also want to use a few screws to secure the seat to the toilet bowl. With the seat in place, you can then replace the lid and enjoy your new raised toilet seat.
7. Secure the clips or clamp on the out side of the toilet bowl
Most people take for granted how easy it is to use the toilet. However, for those with mobility issues, even going to the bathroom can be a challenge. A raised toilet seat can make it easier for people with limited mobility to use the facilities. Most raised toilet seats come with clips or clamps that attach to the outside of the toilet bowl. Before using the seat, make sure that the clips or clamps are secure. This will help to prevent the seat from shifting or slipping while in use. How To Install A Raised Toilet Seat is a simple way to make your bathroom more accessible and user-friendly.
8. attach the toilet seat support arms if you need too
How To Install A Raised Toilet Seat is a relatively easy process that can make a big difference for those with mobility issues. Most raised seats simply attach to the existing toilet bowl using support arms. If your model came with support arms, start by attaching them to the seat.
Then, line up the holes on the support arms with the bolts on the toilet bowl. Once the holes are aligned, insert the bolts and tighten them until the seat is secure. If you’re having trouble lining up the holes, try repositioning the arms until they line up correctly. With the seat in place, give it a few test flushes to make sure it’s securely attached before using it.

What are the benefits of a raised toilet seat?
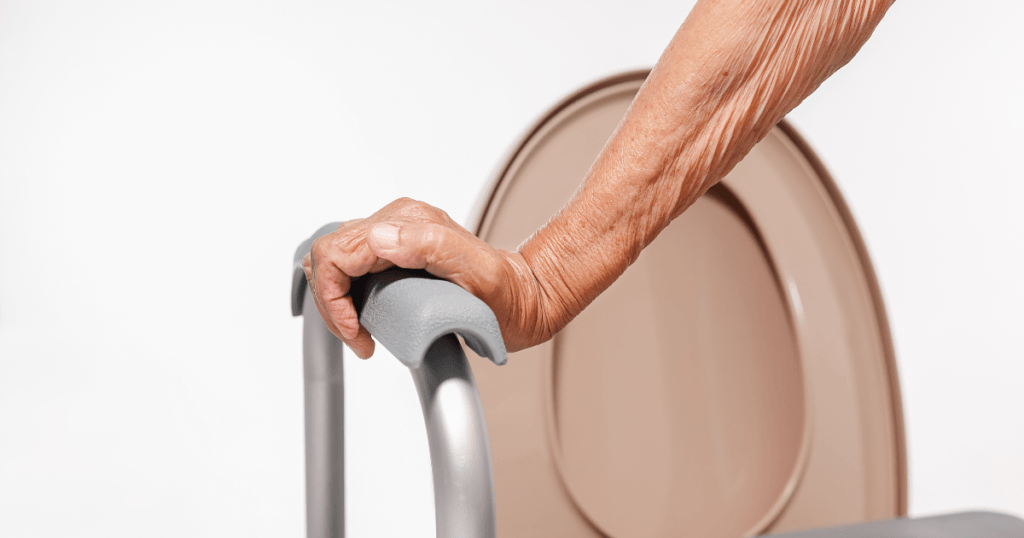
If you have trouble getting on or off your toilet without slipping, this is the perfect solution. These seats give people with shorter commodes an advantage by raising them up so they don’t need to squat low like before!
Conclusion
That’s it! You have now successfully installed your raised toilet seat. Be sure to give yourself a pat on the back – you did it! Now, go take care of some business (literally) and enjoy your new, elevated level of independence. As always, if you have any questions or concerns about this process or anything else related to toileting assistance, please don’t hesitate to reach out. We are more than happy to help in whatever way we can. Congratulations again – you deserve it!